Easily set up your new Crathco Beverage Dispenser and start showing off your drinks to your customers!
Shop CrathcoBefore taking action from the content or resources published here, we request that you visit and review our terms of use.
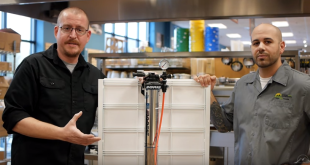
Transcript
Hi, I’m Chris Tavano for Tundra Restaurant Supply. In today’s episode I’m going to show you how to assemble your Crathco beverage dispenser. First thing first is we’re going to put on our bearing sleeve. Very tiny piece, be sure you don’t misplace it. It can easily get lost. Very critical to the operation of this unit. It just slides right on this spindle.
Once we got that there we have our impeller. It’s magnetic so it will slide right on and it will stay right into place. Next we take our bowl container and our gasket and I’m going to stretch it right over this. Then just kind of squeeze it around and make sure it’s flush. Then from there you’re just going to rock it down into place. Make sure it’s nice and snug.
Next we’re going to place in the pump cover. Keep in mind your dispenser unit will come with two of these. One is for a pump spray that we’re going to insert the tube to allow it to fountain over the top and cascade down the sides. The other one here is just an agitator and it’s just more for your heavier liquids, kind of like milk products. Keep in mind that this little piece has a notch that’s going to go right up to the front of the bowl container that the notch sits in.
Next we’re going to install the spray tube. Again, this is to fountain your juice and cascade down the sides. Next we’re going to place our lock-down washer. Next we’re going to install our handle and our valve. You’re going to notice that on the front there’s two v-notches. What we’re going to want to do is we’re going to insert these little cut-aways on the handle right into that v-notch.
Next is our valve. It’s essentially just a weight that we’re going to drop into this hole. It will sit directly in the hole on the handle. You might have to do some adjustments. Always be sure those notches on the handle are in the v-notches of the dispenser bowl, and we got our lever handle.
The last part of the container is our lid. Don’t worry if the spray tube sits a little slightly above the container. The lid itself is recessed a bit. There we go. Last but not least we’ve got our drip tray. It’s got two little lips: one on the top and one on the bottom that’s going to fit right into this little slot. You’ll want to put the top lip in and set it into the bottom, and once you feel it snug on that.
I’m Chris Tavano for Tundra Restaurant Supply. That’s how you assemble your Crathco beverage dispenser. Be sure to comment below and if you have any questions call our sales floor. Please subscribe.