Adding casters to any piece of restaurant or kitchen equipment makes cleaning and reorganization much easier, and can be done with a minimum of effort. In this video, Chris Tavano walks you through the installation process, as well as how to ensure that the casters that you order will be compatible with your chosen appliance.
Shop CastersBefore taking action from the content or resources published here, we request that you visit and review our terms of use.
Video Transcript:
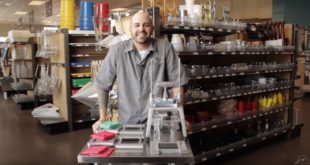
Hi. Welcome to Tundra Restaurant Supply. In this episode, we’re going to show you how to add or replace casters to your equipment.
So casters come in all different sizes and varieties. Unfortunately they’re not necessarily all compatible with all brands, so what you’re going to want to do is try and identify what kind of model number you have of your equipment, or you can measure the whole centers on your existing casters. Today’s demonstration we’re using our Frymaster Fryer. You can locate the model number on the inside panel of the door or you can check our other video, “Hot to locate model numbers on your equipment.” If it’s in a tricky spot you can always get an extendable flashlight to get to those hard to reach areas.
Currently we’re measuring the centered holes of our existing legs or casters. In this case, I’ve started the center of this screw on 1 just because it’s a little bit difficult to get to the edge of the tip of the measuring tape. You can also notice that it gets all the way over to 2-3/4. Minus the 1, the distance of these 2 centers is 1-3/4 inches. You’ll want to do the same thing for the opposing direction as well. Here we can notice it’s 3 inches. You can either search by your model number on the piece of equipment, or you can certainly put in the dimensions of your hole centers.
Also be sure that when you’re searching for replacement casters that you look for a caster that has a wheel diameter large enough to be able to put your equipment’s bottom edge approximately 6 inches off the ground. Also be sure that before you do any kind of repairs or move any of your equipment that everything is turned off, disconnected, drained, and cool before you start doing any work on it. Also keep in mind as your replacing your casters, you might want to have some wedges to be able to balance your equipment upright while you replace your casters or legs. Or have an equipment dolly or a second hand to be able to stabilize the piece of equipment while you’re working on the casters.
That’s how you identify and install replacement casters for your equipment. Surely at times it might be easier to lay your equipment on its side to do its replacement maintenance. However, be sure that if you’re working on a piece of equipment with a compressor, that you wait a full 24 hours once you place it back upright before you plug it in to allow the fluids to get back into the compressor.
I’m Chris for Tundra Restaurant Supply. Join us again next time.