If you rely on a large capacity rice cooker, such as this model from Rinnai, you know that any time it spends broken, or not operating optimally, creates more problems and a loss of time. However, if the problem is with the pilot light – either not lighting at all, or going out on its own – there could be an easy way to quickly repair it and get your rice cooker back up and running.
Shop Rinnai Rice Cooker PartsBefore taking action from the content or resources published here, we request that you visit and review our terms of use.
Video Transcript:
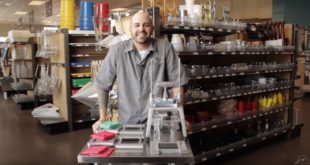
Hi. I’m Chris Tavano for Tundra Restaurant Supply.
In this video we’re going to show you how to trouble shoot some comment set backs and easy maintenance repair for your Rinnai Commercial Gas Rice Cooker.
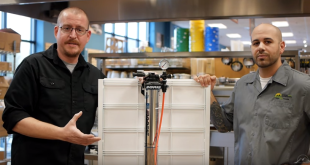
Some tools that you may need are a phillips head screwdriver, an adjustable crescent wrench, needle nose pliers and optional, some pipe cleaner to clean out your tubing. Often can be found in arts and crafts supply stores.
The first common set back to troubleshoot for your Rinnai Commercial Gas Rice Cooker is there’s no flame or the pilot light won’t light itself.
First thing to check is your quick disconnect gasoline all the way up to your Rinnai Gas Cooker.
Remember that this valve needs to be parallel or in line for it being turned on. Perpendicular is turned off. The first thing to check.
From there, if it’s still not lighting and your gas is being hooked up to the machine itself, you’re most likely looking at a clogged pilot orifice that we need to replace. We’ll do that next.
The first thing you need to do is click your ignition button a couple of times. You shouldn’t have to do this more than 3 times and you should see a small flame behind your pilot housing right underneath here.
If your rice cooker is getting gas but your pilot light won’t stay lit, your problem is most likely build up in the pilot orifice which supplies gas to the pilot itself.
If your pilot lights, hold your ignition switch down for about 30 seconds and once you release it, if the pilot goes out, most likely your problem is the thermocouple.
The thermocouple is the safety device that ensures the pilot light is lit before the machine actually supplies causing gas to the burners.
If your thermocouple is bad, it will prevent the pilot and the burners from staying lit.
Once you identify good and correct has line connection, the next thing to do is actually tackle and repair and maintain your pilot orifice.
Before you perform any kind of maintenance or repairs to your equipment, be sure that it is always off and disconnected from any gas line.
Then from here, we see there’s 1 little screw holing on the drip pan. We’re going to go ahead and unscrew that and the drip pan slides right off.
The pilot orifice is located right behind this brass knot which is attached to this aluminum gas tube which is very fragile.
First, we’re going to take this clip on the thermocouple and undo this, set that aside. Just bend your thermocouples out of the way.
From here we’re going to see a screw and the pilot assembly that we need to undo. You can go ahead and set that aside.
From there, you can just bend this slightly out of the way.
When removing this brass knot to get access o your pilot orifice, keep in mind and remember that this aluminum has tubing is very fragile and we’re going to want to twist off the pilot assembly while holding that brass knot still.
This little brass tip right here is your pilot orifice. Often times in this little tube, in the pilot assembly can get clogged and that’s where we need our pipe cleaner.
Just take your pipe cleaner, stick it right down the tube and just kind of scrub it out.
This is a .25 pilot orifice. That number refers to the size of this little pin prick whole on the back and this is not interchangeable with any other orifice. Be sure you have the .25 orifice for your pilot assembly.
All right. Once we get our .25 pilot orifice into our pilot assembly, just a matter of screwing this back on in place to this aluminum coil. Again this aluminum coil is fragile so we don’t want to actually twist the knot, just want to get the pilot assembly finger tight, then make sure it’s nice and snuggles with our wrench holding on to that knot.
From there we can go ahead and place this back down on our housing for our pilot assembly. An easy way to get this screw back in, you just go ahead and put the screw on the housing itself and aim with that. And that’s how you replace your pilot orifice.
And then be sure that we put our thermocouple back into its place and the clip. Be sure when you’re using your clip, the hoop is for your finger to hold, to push it back in place.
The single sided end is for you to actually brace the thermocouple in.
If you recognize that you pilot light is igniting but it won’t stay lit, what you’re looking at is your thermocouple itself, needs replacing.
Again remember, this little clip here was for the thermocouple, take that out. We got a little screw down here that attaches to the thermocouple to the gas valve and then from there, your going to have to try and get the plastic clip with some needle nose pliers. This is probably the most tricky part just because the tight area to get to.
Take a look at the clip on this thermocouple. It just slides right into place and it clicks and once it clicks its locked itself into place.
To get it out, you’re always getting the needle nose pliers right on these ends and just squeezing it and pulling it right out.
Your new thermocouple probably come pretty straight. However, you’ll have to bend the coils as need be.
First thing first is you probably want to get that plastic clip to secure in first, then from there we can bend everything else around as need be and as necessary to get thermocouple back into place.
Again, getting that little screw on the thermocouple. It might be kind of hard to aim. You can go ahead and put it in the cable first then just point it right down into the hole.
And last but not least, our thermocouple clip. Again, the single sided non-looped end goes in the back, the hoop goes over the couple and this clamps right back into place.
And that’s how you replace your thermocouple.
I’m Chris Tavano for Tundra Restaurant Supply and that’s how you diagnose and perform some common repairs to your Rinnai Commercial Gas Rice Cooker. Cheers to a better mise en place!