Don’t put up with time and efficiency lost due to a leaky pre-rinse! Most common leaks are easy to fix, and often don’t require you to replace more than one valve or washer. Learn more in this video how-to!
Shop Pre-Rinse PartsBefore taking action from the content or resources published here, we request that you visit and review our terms of use.
Transcript
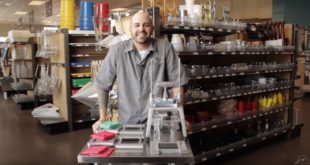
Hi, I’m Chris Tavano for Tundra Restaurant Supply. In today’s episode I’m going to show you common leaks to your pre-rinse assembly and how to troubleshoot and maintain them.
(music)
The most common areas for leaks on your pre-rinse would typically in a few common spots, either your hose itself, one of the two washers on either side of your handle, or somewhere around the face-plate itself. Here’s how we fix those.
The first leak you might see is actually coming from your stainless steel hose. If it’s leaking through this, just replace the hose itself. Your next spot might be somewhere around the handle whether it be at the bottom of the handle or the top of the handle. Keep in mind in both of these spots of the handle, there’s a washer. So if it’s leaking in one of these spots, you’re most likely going to replace that washer. So careful when unscrewing this pre-rinse because the washer just sits there, and there’s that washer, so if it’s leaking on that side, that’s the washer that’s going to need to be replaced.
Same thing applies to the bottom of the handle. If it was leaking there, go ahead and unscrew the bottom of the pre-rinse, right in there, that washer will need to be replaced.
Next common place gets a little bit tricky because this next leak, these next two leaks both involve the face-plate itself. If you look at this seam right here from the top, if it’s leaking through this top seam, we’re going to want to replace this bumper itself. Unscrew this face-plate, be sure not to lose the screw, so this entire rubber bumper will need to be replaced if it’s leaking from the top of that. Just put it on, get your Phillips head screw, pretty easy right there.
If you’ve identified that your leak is not coming from the top of the bumper and is actually coming through the water jets itself, you’re most likely going to need to replace this bonnet in here. Here’s how you do so. You’re going to remove the handle with a Phillips screwdriver, there are two Phillips screws so you’re going to need one to anchor the other on the other side. Once you remove that handle, go ahead and begin to unscrew this piece. If you notice, this valve is very similar to the valves that we had in our previous plumbing video of identifying faucet leaks. Keep in mind that your odds are that if it’s leaking out of the face of the spray nozzle itself, you’re most likely going to need to be replacing the seat washer right here, or the entire unit itself.
However, if it’s leaking from that valve stem assembly in the first place, it’s most likely this black washer. Again, inspect this whole unit and the integrity of the washers and valves in themselves and just replace the whole unit if need be.
I’m Chris Tavano for Tundra Restaurant Supply and that’s how you identify and troubleshoot common leaks to your pre-rinse assembly. Please comment below or if you have any other questions, contact our sales floor. Please subscribe to our weekly videos as well.
(music)