If the rice in your Rinnai Commercial Gas Rice Cooker is coming out over cooked or under cooked, the most likely cause is a faulty thermal sensor.
Before taking action from the content or resources published here, we request that you visit and review our terms of use.
Video Transcript:
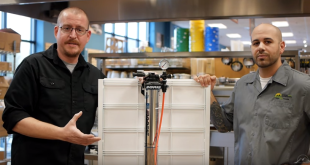
Hi. I’m Chris Tavano for Tundra Resturant Supply. In this video we’re going to show you how to troubleshoot some common setbacks and easy maintenance repair for your Rinnai Commercial Gas Rice Cooker.
The last common setback that you’re going to experience with your Rinnai Commercial Gas Rice Cooker is actually how the rice itself is cooked. Whether it comes out overcooked or undercooked, it really comes down to your thermal sensor itself. Again, that’s this piece in the center with the spring. The reason why this is so important is because this is run by an induction magnet that actually cooks your rice from the bottom of this pan. Always be sure first and foremost that this surface is spic and span clean as well as the top of your thermal sensor itself.
From there, if you see any type of wear and tear from the daily grind and it is clean but you see the impression of the magnet inside, that means your thermal sensor needs replacing anyway.
First, you’re going to turn the whole machine upside down. The screw right here, the setscrew. Take that right out. First thing first, is you’re going to want to release the lowest washer on the plunger arm of the thermal sensor from the operating arm of the base. What I did is I pushed down on the spring of the plunger on the thermal sensor itself to get this pin out of that hole.
From there, this plunger should just be able to detach right from the operating arm and it will sink right in to the thermal sensor itself because it is a magnet. Nest, we need to remove this tricky littler securing spring of your thermal hot sensor. Pretty much you see the hoop in the back, you’re going to push away from the center and it should just pop right out of that hole.
From there, you’re going to give it a little 90 degree twist so that way the base of it can come out the bottom. Take note of the positioning of the feet on your thermal sensor and where there are in relation to the housing basis. For instance, this one foot on the thermal sensor has an angle cut into its base of its foot. Take note of that because when replacing this later you’re going to want to line that one special foot up in the same direction that you just took that securing pin from and just slides right out from there.
This is the thermal sensor and this is pretty much what drives the cooking of the rice. The cooking of the rice has nothing to do with the amount of weight or the amount of water you have. Strictly, it has to do with heat. Thermal means heat, this is essentially a heat sensor. That’s how it’s going to regulate the temperature of the cooking of your rice.
This is your thermal sensor spring. Keep in mind, this is actually tapered so it means one circumference is a little bit smaller than the other circumference. Meaning, it’s only going to fit on your thermal sensor one way. Keep in mind if you put this on and this ring can get above it, you got it on backwards. You have the big end at the top. What we do want is the small end at the top. Now it fits flush, you can’t quite get it over that top lid.
Take note of the shape of the base of this one foot compared to the other two. This angle to foot is going to be positioned in the back corner where we release that securing spring. Actually, replacing this securing spring is much easier than it looks, much easier than it was coming out. Big thing to take note of is this little L-shape in the end. It needs to go through this hole and down and into this slit that is positioned next to that angled foot base that we’re speaking of earlier.
Then once that’s in place there we’re going to focus on pushing that little hoop all the way to that back little slot that we took it out of earlier. Once you get that spring hooked back up to the base in both spots, you get the plunger from the sensor again. Remember, we have this one slight pin that needs to go in that hole. However, do not just want to put it in there like this. That is not secure.
What you’re going to want to do is push that first washer down with that pin down on the spring and get that to sit right in here. Now, do you see how the arm as well as the plunger are securely together in between those washers? Now, it’s just a matter of rotating that pin right into the hole. It’s just a matter of ease to get this piece back screwed into place. There you have your thermal sensor replaced.
I’m Chris Tavano for Tundra Restaurant Supply and that’s how you diagnose and perform some common repairs to your Rinnai Gas Commercial Rice Cooker. Here’s to a better mise en place!