The most used and abused piece of kitchen equipment is the range. Luckily it’s probably also the easiest to repair. There are five range components that need to be replaced the most frequently:
- Top Grate
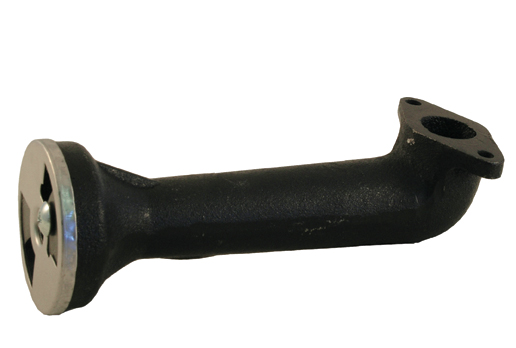
- Burner Head
- Venturi (the pipe attached to the burner head; they usually come with a new head)
- Top burner pilots
- Top burner gas valves
If you are having problems with the oven portion of your range, check out these tips on repairing the oven. There are additional parts depending on what other features your range has. A convection oven would also have a blower motor and fan. If there is a griddle on the range then burners and gas valves may need repair.
When working on a range always remember to shut off the gas!
1. The top grates only need replacing if they have cracked due to metal fatigue or if they have been dropped and broken.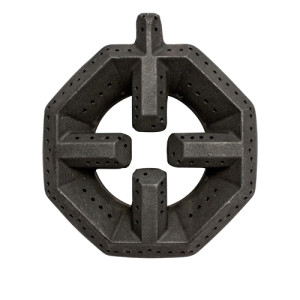

2. Burner heads usually become plugged over time. There are usually two screws that connect the head to the venturi. It is a good idea to use some kind of rust dissolver on the screws to loosen them. Once the screws are out you can install the new head, and always remember to replace the gasket as well.
One alternative to replacing the head is to get a drill bit the same size as the holes in the head and drill out the grease build up in them. However, this can sometimes alter the flame pattern.
3. Replacing the venturi is only necessary if it has been dropped or broken. Use the same procedure for replacing the burner head and remember to install a new gasket.
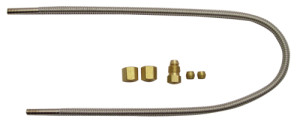
4. Top burner pilotsneed to be replaced if they become clogged. They are very difficult to unclog, and generally need to be replaced. There are three types of pilots:
Those with the tube pre-welded to the pilot head.
Those that have a nut and ferral to slide over the tube and be tightened onto the tube.
Pre-formed pilot assemblies specific to a particular range.

When replacing the pilots you will have to remove the front top plate (bull nose) from the range to access the pilot adjustment valves. This will also have to be removed to replace the burner valve described below.
The pre-welded type is fairly easy to install. To replace, disconnect the pilot tube from the pilot adjustment valve and remove. Place the new pilot head and tube next to an existing one and follow the contour while slowly bending to form the same shape. When you get to the end you may need to cut the tube off, using a tubing cutter. A nut then needs to be put on, and then a ferral and screw back onto the pilot adjustment valve.
The type with the nut and ferral is very easy. Simply use a tubing cutter and cut if off just below the old pilot head. Remove the nut and ferral from the new replacement pilot head and slide them over the tube, nut first and then the ferral. Slide the pilot head onto the tube and tighten the nut up to the pilot head.
The pre-formed pilot assemblies are far easier because they are all bent and ready for installation, the only draw back is they are a little more expensive than the others.
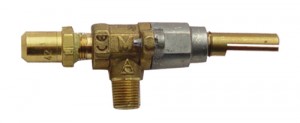

5. Top burner gas valves are fairly easy to replace. With the top plate (bull nose) removed you can access them easily (part of the frame runs across the top of them). If you are replacing all or just one, the burners must be removed if they have a slip type orifice. If there is a tube type burner valve they need not be removed because you can disconnect the tube from the burner valve and move it out of the way.
In either case when the burners or the tube is disconnected take a wrench and screw out the valve being replaced (in some cases you may have to remove a pilot adjustment valve to be able to turn the burner valve by it).
Once the old valve is removed, put some gas thread sealer on the treads of the new valve and screw it back into position, being careful not to over tighten. Reassemble the unit except for the top plate. Turn the gas back on and light the pilots (this may take a few minutes because the gas must first force out the air in the manifold).
Once the pilots are lit, turn on the first burner. There may be no gas flow because the orifice on the new valve may be closed. Using two wrenches, one to hold the valve the other to turn the orifice, open the orifice to allow gas flow (this may take a couple of turns).